Croissants at Home: Mastering French Puff Pastry
Making croissants at home is a rewarding process that involves patience, technique, and a few simple ingredients. The foundation of a classic croissant lies in the laminated dough, where layers of butter are folded into a yeast-based dough to create a light, flaky texture. This article provides a detailed guide to understanding and executing the lamination process, from mixing ingredients to shaping and baking. Whether you are a novice baker or have some experience, these steps will help you master the art of French puff pastry in your own kitchen.
The key to successful croissants is understanding the role of each component and the importance of temperature control. The dough, the butter block, and the folding technique all contribute to the final structure. By following the methodology outlined here, you can achieve professional-quality results at home. This guide focuses on the process, ensuring that you have the knowledge to create croissants with beautiful layers and a tender crumb.
Understanding the Ingredients and Equipment
Before starting, it is essential to gather the right ingredients and equipment. For the dough, you will need flour, water, milk, sugar, salt, yeast, and butter. The butter is crucial: it should be high-fat, preferably European-style, as it has a lower water content and higher fat percentage, making it easier to laminate and yielding a richer flavor. The flour should have a moderate protein content, such as all-purpose or bread flour, to provide structure without being too tough. Yeast can be active dry or instant, and the amount may need adjustment depending on the recipe.
Equipment includes a rolling pin, a large work surface, a bench scraper, plastic wrap, and a baking sheet. A rolling pin with a smooth surface is ideal. You may also consider a marble or wooden surface, as they stay cooler than metal. Having a thermometer is helpful to monitor dough and butter temperatures, as this is critical for the lamination process. Additionally, you will need a brush for egg wash and a sharp knife or pastry cutter for trimming edges.
It is important to note that the temperature and humidity of your kitchen can affect the dough. On warm days, you may need to chill the dough more often. The key is to keep the butter cold and firm but pliable. If the butter becomes too soft, it will blend into the dough, preventing the formation of distinct layers. Similarly, if it is too hard, it will break when rolled. The optimal temperature for lamination is around 60°F (15°C) for the dough and 55–60°F (13–15°C) for the butter.
Making the Detrempe and Butter Block
The first step is to prepare the dough, also known as the detrempe. In a large bowl, combine the flour, sugar, salt, and yeast. In a separate container, mix the water and milk. Gradually add the liquid to the dry ingredients, mixing until a shaggy dough forms. Turn it out onto a lightly floured surface and knead until the dough is smooth and elastic, about 5–7 minutes. The dough should not be too sticky; if it is, add a little flour, but avoid over-flouring, as this can make the final pastry tough. Shape the dough into a rectangle, wrap it in plastic, and refrigerate for at least 2 hours or overnight. This resting period allows the gluten to relax and makes the dough easier to roll.
While the dough chills, prepare the butter block. Place the butter between two sheets of parchment paper and pound it with a rolling pin until it is pliable but still cold. Shape it into a square, about 1 inch thick. The size of the square should match the later folding dimensions. A common approach is to make the butter square about 6×6 inches (15×15 cm), while the dough is rolled into a rectangle about 12×8 inches (30×20 cm). The butter square should be chilled but still pliable, so if it becomes too soft, refrigerate it for a few minutes.
It is essential to ensure that the butter and dough have similar consistencies. If the butter is too hard, it will break through the dough during rolling. If it is too soft, it will merge with the dough. A good test is to press the butter gently with your finger; it should leave a slight impression but not feel oily. If the butter is too soft, place it in the refrigerator for 15 minutes.
Laminating the Dough: The Folding Process
Lamination is the core technique that creates the flaky layers. It involves enclosing the butter block within the dough and performing a series of folds and rolling. The most common method is the ‘letter fold’ (also called a book fold), where the dough is folded in three, like a business letter. The number of folds directly influences the number of layers. A classic croissant recipe typically uses three turns, resulting in many thin layers.
To begin, roll the chilled dough into a rectangle on a lightly floured surface. The rectangle should be about three times the length of the butter square and slightly wider. Place the butter block on one half of the dough, leaving a border. Fold the other half of the dough over the butter, and press the edges to seal. Ensure that the butter is fully enclosed to prevent it from oozing out during rolling.
Now, roll the dough out into a long rectangle, maintaining an even thickness. The goal is to lengthen the dough to about three times its original length, but the width should remain consistent. It is important to roll gently and evenly, applying pressure from the center outward. If you notice the dough springing back, let it rest for a few minutes. Once the rectangle is formed, perform a letter fold: fold one third over the center, then the other third over that, like folding a letter. This completes one turn. Rotate the dough 90 degrees and repeat the rolling and folding process for the second and third turns. Between each turn, wrap the dough in plastic and refrigerate for at least 30 minutes to 1 hour. This rest is crucial to relax the gluten and keep the butter cold.
After the final turn, refrigerate the dough for at least 2 hours or overnight before shaping. This allows the dough to relax and the layers to set.
Shaping and Proofing the Croissants
Once the dough is well-chilled, roll it out into a large rectangle, about 1/4 to 1/8 inch (6–3 mm) thick. The exact thickness will depend on the size of croissants you want. Using a sharp knife or a pastry cutter, trim the edges to create a clean rectangle. Then, cut the dough into triangles along the length. For standard croissants, a base width of about 4 inches (10 cm) and a height of about 6 inches (15 cm) works well. The triangles should be elongated; the longer they are, the more rolls you will get.
To shape each croissant, give the triangle a gentle stretch to elongate it. Starting from the base, roll the dough towards the tip, applying light pressure to ensure the layers stick together. The tip should be tucked underneath the croissant to prevent it from unrolling during proofing. Place the shaped croissants on a baking sheet lined with parchment paper, leaving enough space between them to allow for expansion.
Proofing is a critical step. The croissants should be placed in a warm, draft-free environment, ideally around 75–80°F (24–27°C) with high humidity. You can use a proofing box if available, or simply place them in an oven with a pan of hot water. The croissants should proof until they have puffed up and the layers are visibly distinct. This can take anywhere from 1 to 2 hours, depending on the ambient temperature. A simple test is to gently press a croissant; if it springs back slowly, it is ready. Over-proofing can cause the butter to melt and the layers to collapse, so it is better to err on the side of under-proofing if you are unsure.
Before baking, brush the croissants with an egg wash (beaten egg with a little milk or water) to give them a shiny, golden crust. Be careful not to let the wash pool on the surface, as it can inhibit rising.
Baking and Achieving Flaky Layers
Preheat your oven to 400°F (200°C) for a standard oven, or 375°F (190°C) for a convection oven, as it may bake faster. The high heat is necessary to create steam from the butter and dough, which lifts the layers. Place the baking sheet in the oven and bake for 15–20 minutes, rotating the pan halfway through for even browning. The croissants are done when they are deep golden brown and the layers are visibly puffed. The internal temperature should reach about 200°F (93°C) to ensure they are baked through.
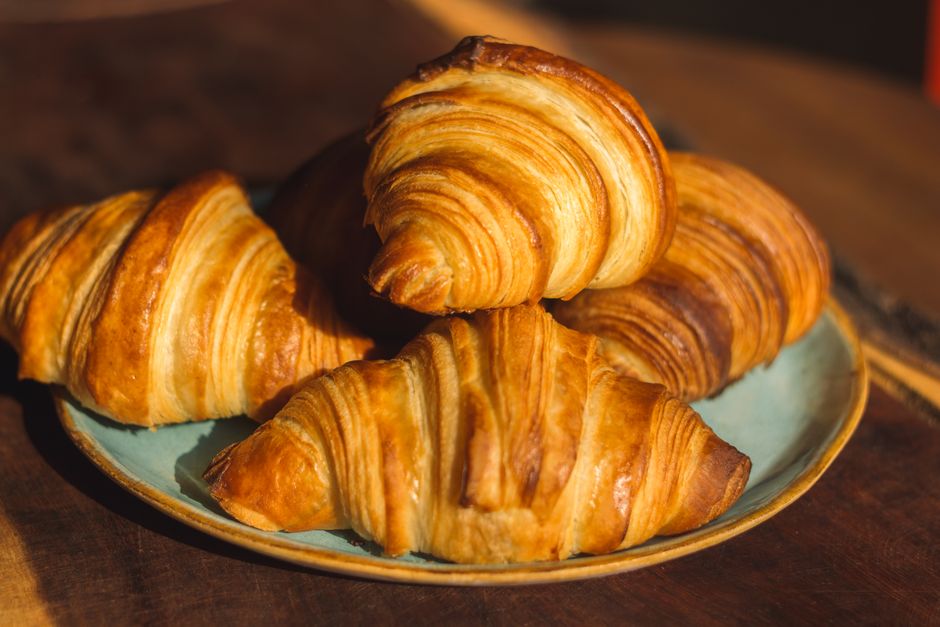
Once baked, remove the croissants from the oven and let them cool on a wire rack for a few minutes. They are best enjoyed warm, shortly after baking. The texture should be crisp on the outside, with a tender, airy interior full of defined layers.
If the croissants do not have the expected flakiness, there could be several reasons: the butter may have been too soft, the dough may have been over-proofed, or the baking temperature was too low. Understanding these variables helps you adjust your technique for future attempts.
Common Challenges and Tips for Success
Mastering croissants at home takes practice. One common issue is butter leaking from the dough during baking. This often happens when the edges were not sealed properly or the butter was not kept cold. Ensuring a tight seal and chilling the dough adequately between turns can prevent this. Another challenge is uneven layers, which may result from excessive rolling or not maintaining a rectangular shape. Use a ruler and take your time to keep the edges neat.
Temperature control is the most crucial aspect. If the dough becomes too warm, it will be sticky and difficult to work with. If it is too cold, it may crack when rolled. Work in a cool room, and if you feel the dough warming, return it to the refrigerator. Some bakers freeze the dough after shaping, then place it in the refrigerator overnight for the final proof, which can improve the layers.
Humidity also plays a role. If your environment is very humid, the dough may absorb moisture and become soft. Adjust the amount of water accordingly, and consider using a lower hydration recipe. Conversely, in dry climates, you may need to add a little more water to the dough.
Finally, do not be discouraged if your first batch is not perfect. Croissant-making is a skill that improves with repetition. Each attempt will teach you more about how the dough behaves and how to achieve those sought-after flaky layers.
Lamination is a technique that rewards patience and precision. By understanding the principles and practicing consistently, home bakers can produce croissants that rival those from a French patisserie.
With these guidelines, you have the fundamental knowledge to start making croissants at home. The process requires time and attention, but the result is a delightful pastry that showcases the beauty of French baking.